
So you want to take your bakery online? The process may seem daunting, but luckily in just a few easy steps you will be able to easily take orders and arrange local deliveries from your very own free Obodo shop. Read below to find out more:
When you're ready to get started with Obodo, simply head to obodo.shop to sign up for your free online shop. In the sign up process, you will be asked to provide some basic information about your shop, including your industry and postcode. It is important that you enter the postcode attached to your bakery's address, as your delivery radius will be calculated from this address (more on this later!).
The first step in creating and personalising your Obodo shop is to apply a theme. The theme will serve as the structure of your shop where you can add your own branding and images later.
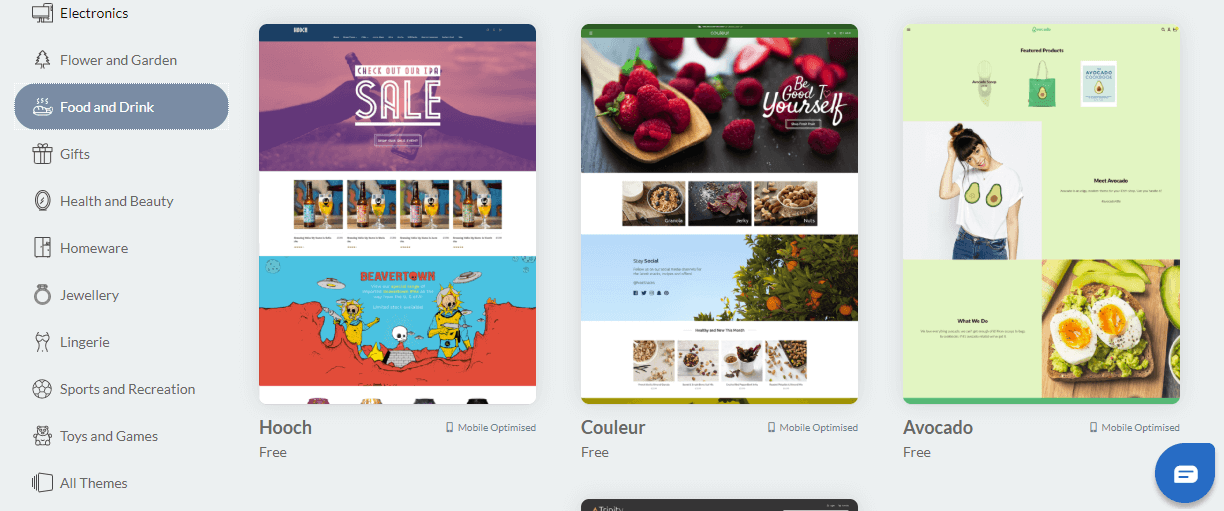
You'll be prompted to choose your theme from your Dashboard, but you can also access this section by selecting the 'Design' tab at the top of the page. A theme will have been automatically selected for you, but if you'd like to change it, simply choose 'Edit' and then 'Change Theme.' You will see a selection of Featured Themes that we recommend for local shops and bakeries like you.
On the left hand side of the screen you'll see the themes sorted by industry, although feel free to choose a theme from any category! You will be able to edit some of the colours within the themes to further personalise them if you wish.
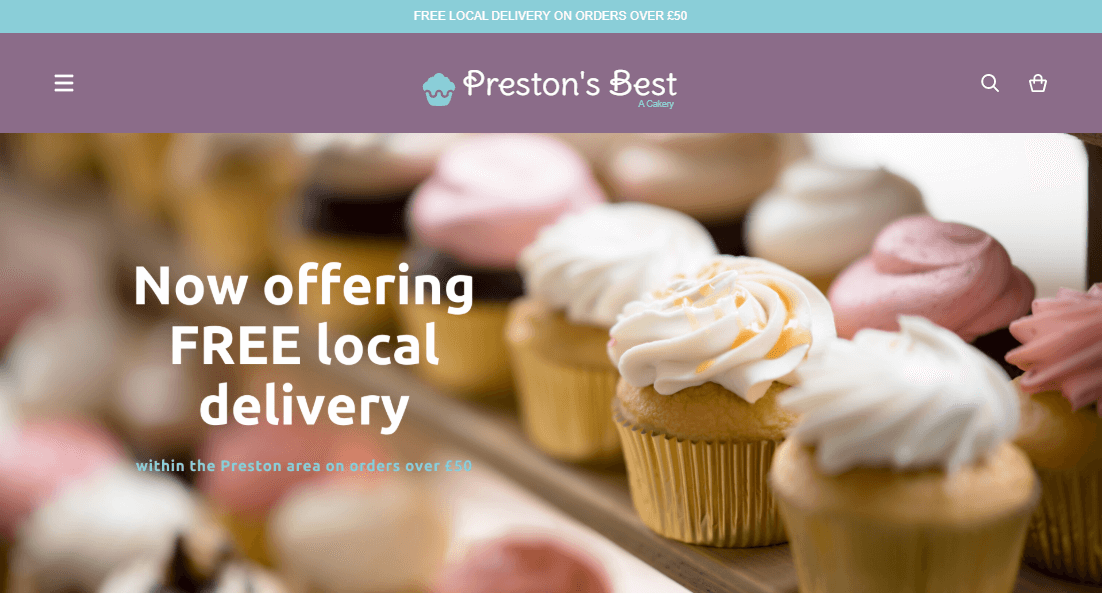
All of the themes you see on Obodo are mobile optimised, meaning that your customers can order from their mobile phones.
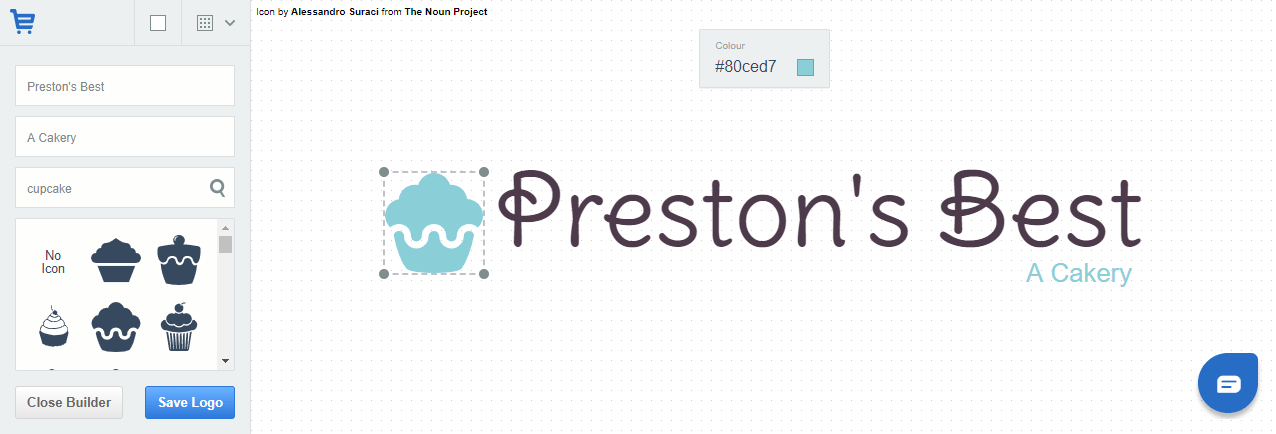
With your Obodo shop you'll have the ability to upload an existing logo or you can use our logo builder if you don't have one already. All of this can be easily located on the 'Design' tab under Theme and then Edit. You can also update your logo from the 'Shop' tab.
Using custom web pages you can have text only pages that provide critical information for your customers. We recommend having an 'About Us' section, but you can also have pages that detail your delivery policies, contact information, business hours, and more. These can be found and updated easily on the 'Design' tab and then by clicking 'Webpages' on the ribbon.
You'll be able to choose from two delivery methods for your Obodo shop: - local delivery and click and collect. You can choose to use one or both of these methods, depending on what works best for you and your business.
Local delivery will allow you to deliver to any address within a maximum of 15 miles from your shop's address. If you'd like to change your delivery radius, you can do this on the delivery settings page. At checkout, your customers will enter their delivery address and any additional notes for their order.
Click and collect allows your customers to order online without providing a delivery address. Once they have paid for their order, you'll want to send them an email letting them know when their order will be ready. This is easy to do from the 'Orders' section of your account.
You'll be prompted to set up a domain name from the dashboard of your Obodo account. A domain name is the web address for your website and it helps your customers to find you, so you'll want to make sure your domain name reflects your business name. Domain names can be purchased through Obodo, or if you've purchased a domain name from somewhere else you can apply it to your Obodo shop in the domain name settings page.
In order to take orders on your Obodo website, you'll need a way for your customers to pay for their orders. You'll be able to easily add your payment method by following the prompts in your online dashboard. Obodo offers Stripe- one of the fastest growing and most popular online payment gateways. With Stripe your business will get access to card and digital wallet (including ApplePay) payments. Strip is fully secure and is compliant with PCI, PSD2 and Strong Customer Authentication (SCA) regulations.
Once you're all set up, it is time to upload your products onto your shop. On your dashboard, you should see a message prompting you to add your first product, but you can also do this from the 'Shop' tab.
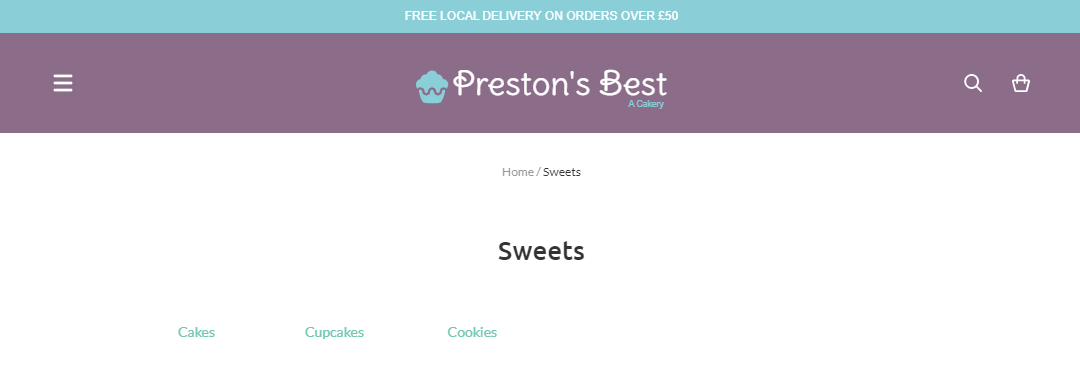
In most cases, you'll want to start by creating categories to hold your products. For example, if your bakery sells cakes, cookies, breads, and pies you may want to have a category for each one. Or, you could have a category for sweets and a category for savouries. Within each category you'll also be able to create subcategories. For example if you made a sweets category, you may further segment it into subcategories for cakes, cupcakes, and cookies.
Once your category is created, you can click into it and add a product. You'll give each product a name, description, and price. Your description is your chance to sell the product! Be sure to use descriptive words and make that cake sound like something your customer would want to buy. You'll also want to make sure that your description has all of the relevant information regarding the ingredients and any allergens. If there is any information regarding delivery or anything else, you'll want to ensure it is added to the product description.
You'll be able to add up to 20 images for each product variant (more on this later!). Ideally, you should use images that you've taken of your own products so that your customers can know what they are ordering. However, if you don't have these images starting out there are many free stock image websites to choose from like Unsplash, Pexels, and Pixabay. Flickr also has an option to filter specifically for images for commercial use.
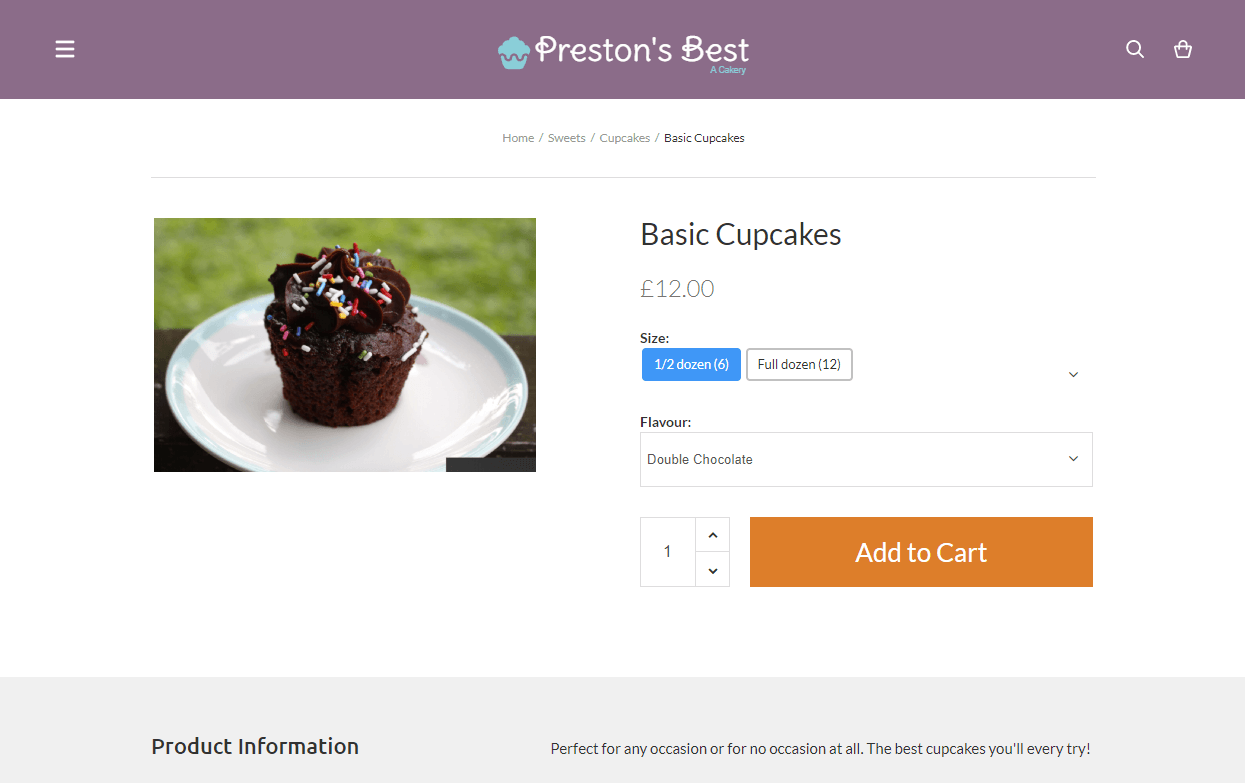
If your products have several different variants, for example a cake that comes in many different sizes and flavours, you'll be able to set this up with Obodo very easily on the variants tab of the particular product. The 'size' variant can be used for cakes that come in both 6" and 10" sizes or perhaps for cupcakes that come in packs of 6 or 12.
You can also create custom variants for any other options like flavours. Once you've created your variants you'll be able to customise the prices for each variant option and decide if you'd like to charge more for certain options like personalisation.
If you have an item that is only available in limited quantities, you'll want to enable stock control from the 'Settings' tab on your online account. Once this is available you'll be able to specify how many of each item are available and stock will be deducted as they are purchased from your Obodo website.
If you are unfamiliar with the laws surrounding distance selling for food, we recommend that you familiarise yourself with the Food Standards Agency guidelines on distance selling, mail order, and delivery. One of the actions you'll need to start out with is registering with your local council. You'll need to do this at least 28 days before you can start delivering your food products. You'll also need to make sure that your food products are delivered in suitable containers, including ensuring that any food that needs to be kept refrigerated is sufficiently cooled during the delivery process.
Before your site goes live you'll want to add your social media accounts to your new website. To add your social media information to your Obodo shop's pages, go to the Features tab and open the Social Plugins feature.
Be sure to also add your new website into the description of your social media profiles so that your followers will be able to shop at your new website. But don't stop there! Create a few posts to announce to your followers that you're now offering local delivery. You can even entice them with a special offer to get those orders rolling in.

We're so excited to have you join the Obodo family! For in-depth guides and links to our ticketed support team, visit https://help.obodo.shop/support/home.

